Insulating a shed is one of the easiest ways to turn it from a chilly storage space into a comfortable, usable part of your home. Whether you use your shed as a workshop, hobby room, garden office or simply want to protect tools and equipment, adding the right shed insulation helps keep the temperature more stable throughout the year. It reduces heat loss in winter, keeps excess heat out in summer and helps manage moisture, which is especially important in wooden structures.
At Insulation UK, we supply a wide range of insulation materials suitable for DIY shed projects as well as trade installations. If you are planning to upgrade your shed, understanding the different insulation options and how to apply them correctly makes the job much easier.
Understanding What to Consider Before Insulating a Shed
Before choosing your insulation materials, it helps to look at the type of shed you have and how you plan to use it. Wooden sheds are the easiest to insulate because their stud frames allow insulation to sit neatly between the timbers. Metal or plastic sheds can still be insulated, but they often need moisture-resistant materials and sometimes additional framing.
Ventilation is another key factor. A shed without airflow can trap moisture, which leads to damp and condensation. The right insulation, combined with adequate ventilation, will help keep the space dry and comfortable year-round.
Did You Know:
Sheds without insulation can experience temperature swings of 10–15°C in a single day, which accelerates condensation and material wear.
You should also think about whether you need insulation for warmth, for protecting equipment, or simply for reducing temperature swings. Each goal may call for a slightly different approach or material type.
Choosing the Right Insulation Materials for a Shed
Not all sheds are built the same, so the insulation you choose will depend on the structure you’re working with. Wooden sheds are usually the easiest to insulate because their stud frames provide ready-made cavities. Metal or plastic sheds can still be insulated effectively, but they often benefit from materials that handle moisture well and offer a clean, rigid finish. With that in mind, here are some of the most practical insulation options available.
Loft Roll Insulation for Flexible, Easy Fitting
Loft roll insulation is one of the simplest materials to work with, especially if you’re insulating a traditional wooden shed. It’s flexible, easy to cut and fits neatly between wall studs or roof rafters. This makes it ideal for DIY projects where you want something straightforward but still effective. Our loft roll insulation range includes glass mineral wool and natural fibre options, both of which offer reliable thermal performance without being difficult to handle.
If your shed has a more irregular frame or tight gaps, roll insulation is a great option because it naturally moulds into place and helps limit cold spots.
PIR Insulation Boards for Stronger Thermal Performance
If you want a more rigid material that delivers higher thermal efficiency, PIR insulation boards are a strong choice. They can be installed between studs or fixed directly to the inside of shed walls, roofs and floors, creating a solid internal finish. This is especially helpful if you’re planning to use your shed as a workspace, garden room or hobby area where you need a warm and stable environment.
PIR boards are also ideal for metal sheds, where a firm, moisture-resistant insulation layer helps prevent condensation and keeps the structure comfortable year-round.
XPS Insulation Boards for Moisture-Prone Areas
Sheds are often exposed to damp conditions, especially at ground level, so choosing insulation that can cope with moisture makes a big difference. XPS insulation boards are rigid, durable and highly moisture resistant, which makes them a great choice for shed floors or lower wall sections. They help reduce cold rising from the ground and provide extra support when placed beneath flooring panels.
For metal or plastic sheds, XPS can also offer an added layer of stability and protection, helping to prevent condensation build-up.
Insulation Slabs for Walls and Sound Control
If your shed has a stud wall structure, insulation slabs are another good option. They fit snugly into the frame, offering both thermal and acoustic benefits. This makes them particularly useful in workshop sheds or hobby rooms where noise reduction is a bonus. The slabs are easy to work with and provide a consistent layer of insulation across walls and roof spaces.
Mineral wool is also a good choice if you want something that balances flexibility, performance and ease of installation in one material.
Where to insulate first (best order)
-
Roof
-
Walls
-
Floor
-
Internal lining
Why?
The roof is the biggest source of heat loss and condensation.
How to Insulate Shed Walls
Shed walls play a big role in how warm or cool the space feels throughout the year. Many sheds use a timber frame, which makes it easier to add insulation within the wall structure. Start by checking the spacing between the vertical timbers so the insulation can be cut accurately and fitted neatly without gaps.
Once the insulation is in place, the walls can be lined internally to protect the material and improve the overall finish. Plywood or OSB works well for storage or workshop use, while plasterboard can be used if the shed is being converted into a more comfortable space. Including a vapour control layer helps reduce the risk of moisture build-up and supports the long-term condition of the shed.
How to Insulate a Wood Shed
Wooden sheds are straightforward to insulate because the timber frame provides natural cavities for insulation. Start by measuring the gaps between the studs and cutting the insulation to fit snugly. The insulation should sit securely within the frame without being compressed, as this helps it perform properly and reduces heat loss.
Once fitted, line the inside of the shed to protect the insulation and create a cleaner finish. It’s important to allow some ventilation, either through small vents or gaps, to prevent condensation from building up. If you’re insulating a metal or plastic shed, fitting a timber frame first follows the same process and creates the structure needed to install insulation correctly while helping manage moisture.
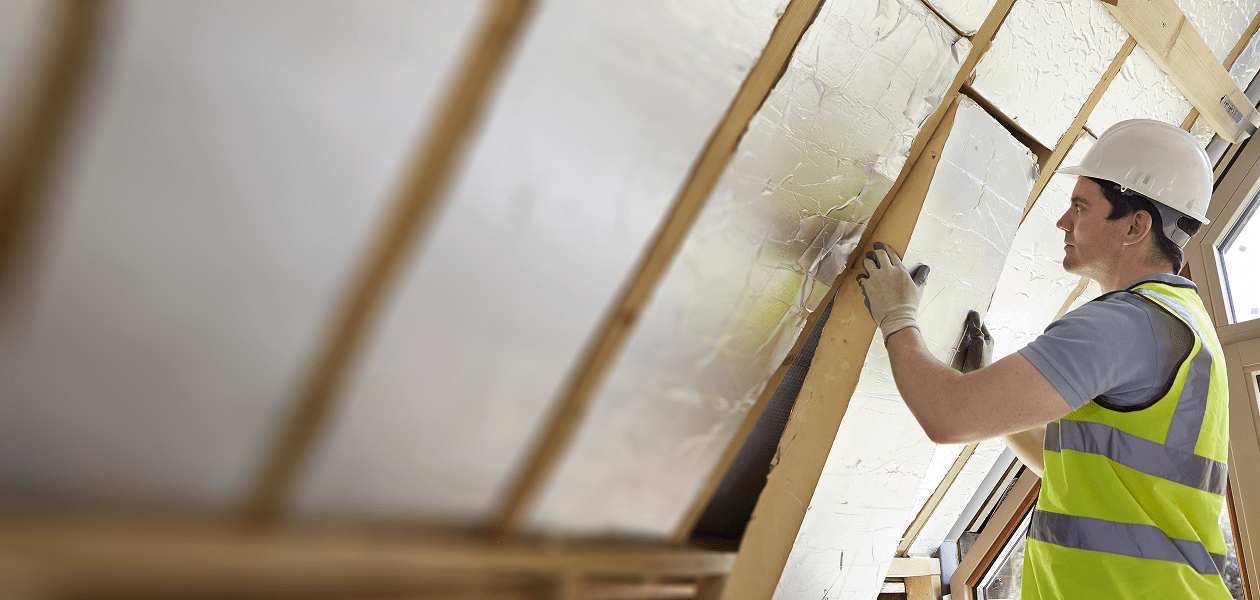
How to Insulate a Shed Roof
A shed roof can lose just as much heat as the walls, so insulating it can greatly improve comfort inside the space. Most shed roofs can be insulated by fitting insulation between the rafters, whether that’s using rigid boards or flexible roll materials. Again, it’s important to leave a small ventilation gap above the insulation to reduce the risk of condensation forming beneath the roof felt.
For higher thermal performance, rigid insulation boards are often the preferred option due to their strength and efficiency. Once the insulation is in place, you can line the inside of the roof with boards to create a neat, finished look while helping the shed stay warmer year-round.
How to Insulate a Shed Floor
Cold rising from the ground can quickly make a shed uncomfortable, so insulating the floor is an important step. Start by lifting the existing floor panels to expose the joists or base underneath. This gives you clear access to fit the insulation properly and ensures there are no gaps where heat can escape.
Next, cut insulation boards to size and place them snugly between the joists or lay them across the base, depending on how the shed floor is constructed. Make sure the boards fit tightly to avoid draughts and cold spots. Once the insulation is in place, refit the floor panels securely. This simple process helps keep heat in, reduces moisture coming up from the ground and makes the shed far more comfortable to use.
Moisture Control and Ventilation
Managing moisture is just as important as adding insulation, especially in sheds and outbuildings. Even a well-insulated space needs airflow to prevent condensation from building up. Without proper ventilation, moisture can become trapped, which can lead to damp, mould and long-term damage.
To help prevent this, make sure air can move through the space. Simple options include fitting small wall or roof vents, or using a breathable membrane behind internal boards. A breathable membrane is a thin layer that allows moisture to escape while helping block draughts. When insulation and ventilation work together, your shed stays more comfortable to use throughout the year.
Energy Tip:
Always leave a small ventilation gap above roof insulation to reduce condensation under roof felt.
In summary, insulating a shed is a practical way to improve energy efficiency, protect stored items and make the space more comfortable to use throughout the year. Choosing the right insulation for your setup helps keep the shed warmer and drier, while reducing heat loss and condensation. When combined with proper ventilation and moisture control, insulation can turn a basic shed into a far more usable and reliable part of your home.
Ready to Start Insulating Your Shed?
Explore our full range of high-quality insulation products to find the right solution for your project. If you need any guidance, our team is always on hand to help you choose the best option for your shed or outdoor space.