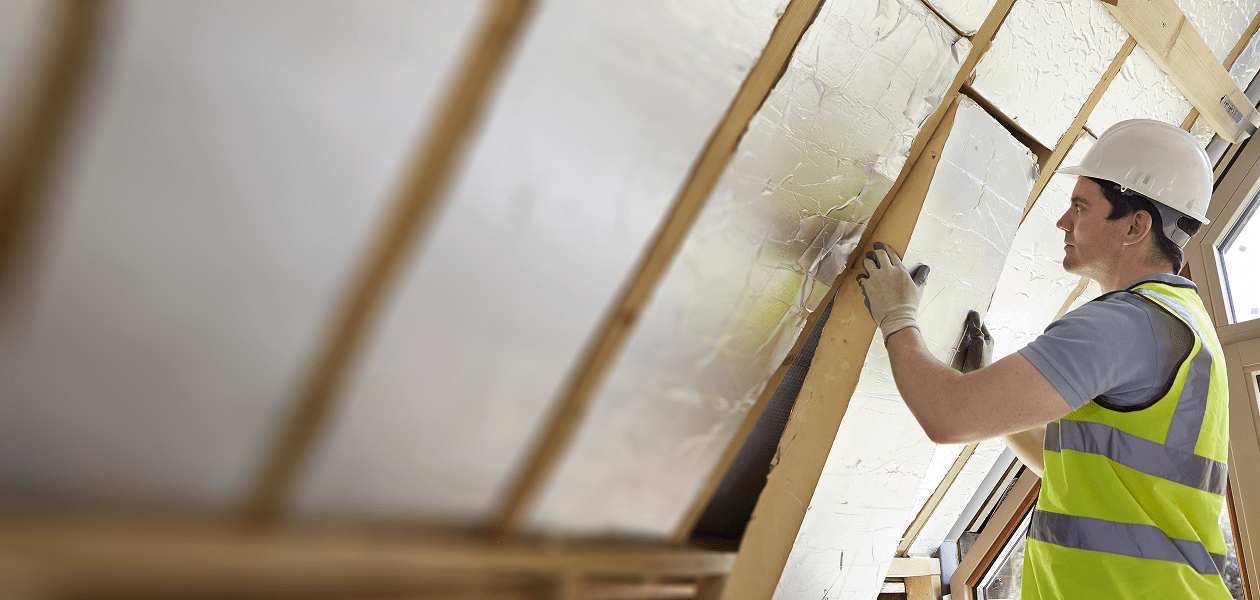
Insulated plasterboard is the go-to choice for UK homeowners and DIY enthusiasts looking to improve thermal efficiency with a quality finish. This guide covers everything you need to know about fitting insulated plasterboard, whether you're using the dot and dab method or fixing to timber battens.
Quick Answers: Insulated Plasterboard FAQs
Can you dot and dab insulated plasterboard?
Yes, insulated plasterboard can be fixed using the dot and dab method on solid, dry walls. This works well on brick, block and concrete walls that are stable and free from moisture issues.
Is insulated plasterboard worth it?
Yes, insulated plasterboard significantly reduces heat loss, lowers energy bills and improves comfort. It combines insulation and plasterboard in one product, saving time and labour whilst delivering excellent thermal performance.
Does insulated plasterboard work?
Insulated plasterboard is highly effective at reducing heat loss through walls and ceilings. Depending on thickness and material type, it can achieve U-values suitable for Building Regulations compliance whilst maintaining internal space.
Does insulated plasterboard need a vapour barrier?
Some insulated plasterboards include an integral foil-faced vapour barrier. For others, you may need a separate vapour control layer depending on the location, construction type and moisture conditions. Check manufacturer specifications for your specific product.
How effective is insulated plasterboard?
Insulated plasterboard delivers proven thermal performance with U-values typically ranging from 0.18 to 0.30 W/m²K depending on thickness. It's particularly effective for retrofit projects where space is limited.
Benefits of Installing Insulated Plasterboard
Better Thermal Efficiency
Insulated plasterboard reduces heat loss through walls and ceilings, keeping your home warmer in winter and cooler in summer. This improved thermal performance translates directly into lower energy bills.
Time and Labour Savings
Rather than installing separate insulation and plasterboard layers, insulated plasterboard combines both steps. This streamlined installation saves considerable time on renovation and new build projects.
Space Efficiency
Because insulation and plasterboard are bonded together in a single board, you achieve excellent thermal performance with minimal impact on room dimensions. This is particularly valuable in smaller rooms or period properties where it's important to maximise space.
Versatile Application
Insulated plasterboard works in new builds, extensions, loft conversions and retrofit projects. It can be fitted to walls, ceilings and loft rafters using various fixing methods to suit different construction types.
Types of Insulated Plasterboard: Which Should You Choose?
Selecting the right insulated plasterboard depends on your specific requirements for thermal performance, budget, available wall thickness and the room's environmental conditions.
PIR Insulated Plasterboard
PIR (polyisocyanurate) offers excellent thermal efficiency with relatively thin boards, making it ideal where space is limited. With thermal conductivity around 0.022 W/mK, PIR boards deliver high performance whilst minimising the build-up on your walls.
Best suited for: New builds, extensions, and renovations that require maximum thermal performance with minimal thickness.
EPS Insulated Plasterboard
EPS (expanded polystyrene) provides cost-effective insulation with moderate thermal performance. Whilst slightly thicker than PIR for equivalent insulation values, EPS boards offer an economical solution for budget-conscious projects.
Best for: Residential retrofits and renovations where budget is a priority and slightly increased wall thickness isn't an issue.
HP+ Insulated Plasterboard
HP+ (High Performance Plus) delivers enhanced thermal performance alongside moisture and fire resistance. It matches PIR's thermal efficiency whilst offering additional benefits for demanding applications.
Best for: Areas where moisture resistance matters or where enhanced fire performance is required, offering PIR-level performance at a competitive price point.
Insulated Plasterboard Thickness Guide
Choosing the right thickness depends on your thermal performance requirements, available space and budget. Here's a comparison of common thicknesses:
|
Thickness |
Typical Application |
Space Impact |
Thermal Performance |
|
20-25mm |
Space-constrained retrofits, bathrooms |
Minimal |
Good |
|
30-40mm |
Standard internal walls |
Moderate |
Very good |
|
50-60mm |
External walls, higher performance |
Noticeable |
Excellent |
|
70-100mm |
Maximum performance, new builds |
Significant |
Outstanding |
Where Can You Install Insulated Plasterboard?
Insulated plasterboard can be fitted in multiple places, such as internal walls, partition walls, loft conversions and ceilings.
Can You Dot and Dab Insulated Plasterboard?
Yes, you can dot and dab insulated plasterboard to solid walls using the right technique and materials. This method works well on brick, block, concrete and rendered walls that are dry and free from moisture.
When You Can Use Dot and Dab
The dot and dab method is suitable for:
- Solid brick or block walls
- Concrete cavity walls (internal face)
- Rendered solid walls
- Internal solid partitions
- Dry, stable walls without damp issues
When NOT to Use Dot and Dab
Avoid dot and dab on:
- Walls prone to moisture penetration
- Timber or steel frame constructions
- Very uneven walls
- Walls where services need running behind boards
- External faces of walls exposed to weather
Fixing Insulated Plasterboard to Solid Walls
Installing insulated plasterboard on solid walls requires the right preparation and technique to ensure a lasting and effective installation.
Preparation for Solid Walls
- Check for Damp - Ensure walls are completely dry before installation. Address any moisture issues first.
- Remove Loose Material - Strip away wallpaper, flaking paint or loose plaster.
- Repair Damage - Fill large holes or cracks with suitable filler.
- Apply PVA Sealer - On porous masonry, apply diluted PVA to prevent moisture absorption from the adhesive.
Dot and Dab Installation on Solid Walls
Apply adhesive dabs in a grid pattern approximately 250mm apart. The adhesive must be thick enough to support the board but not so runny that it slumps. Press boards firmly into place, check they're level, and add mechanical fixings (3 per board minimum) for security.
For detailed step-by-step instructions, see the full dot and dab method section below.
Fixing Insulated Plasterboard to Battens
The timber batten method provides a more versatile framework than dot and dab, allowing for additional insulation, services and better moisture management.
When to Fix to Battens
Use timber battens for:
- Timber or steel frame constructions
- Walls at risk of moisture penetration
- Uneven walls requiring levelling
- Where electrical cables or pipes need running behind boards
- New partition walls
- Situations requiring additional insulation between battens
Batten Specifications
Typical batten sizes are 38mm x 50mm treated timber, fixed vertically at 400-600mm centres. Battens must be securely fixed to structural elements and checked for level using a long straight edge.
Types of Fixings for Insulated Plasterboard
For Dot and Dab Method:
- Plasterboard adhesive (suitable for dot and dab)
- Mechanical fixings: 3 per board minimum
- Large washers to prevent pull-through
- Alkaline-resistant screws
For Timber Batten Method:
- Plasterboard screws (length depends on board thickness)
- Screws every 300mm along battens
- 10-15mm from board edges
- Wall fixings suitable for your wall type (masonry anchors, frame screws)
How Many Fixings Per Board?
- Dot and dab: Minimum 3 mechanical fixings per board for safety
- Battens: Screw every 300mm along each batten
- Ceilings: Screw every 300mm (safety critical)
How to Install Insulated Plasterboard: Dot and Dab Method
Tools and Materials Required
Materials:
- Insulated plasterboard panels
- Drywall adhesive suitable for dot and dab
- PVA adhesive (for sealing porous walls)
- Joint tape and compound
- Mechanical fixings (screws and washers) - 3 per board minimum
Tools:
- Tape measure
- Spirit level
- Plasterboard saw or sharp utility knife
- Straight edge or long ruler
- Trowel for applying adhesive
- Mixing bucket and paddle
- Pencil or chalk
- Dust mask and safety glasses
Step-by-Step Installation
1. Preparation
Measure the wall area and calculate materials needed, accounting for windows, doors and other features. Ensure walls are clean, dry and free from loose material, debris or wallpaper. Repair any significant damage such as large holes or cracks.
For porous masonry walls, apply a mixture of PVA and water according to manufacturer instructions. This prevents the wall from absorbing moisture from the adhesive, which could compromise the bond. Allow to dry completely before proceeding.
2. Planning the Layout
Mark out the position of each board on the wall using a spirit level and pencil. Start from one corner and work across, planning where cuts will be needed around windows, doors and sockets. These marks will guide your adhesive placement.
3. Cutting Boards
Whilst the PVA sealer dries, measure and cut boards to size. For straight cuts, score deeply along a straight edge with a sharp utility knife, snap the board back, then cut through the backing paper.
For cuts around obstacles, measure carefully from the adjacent board, mark clearly on the plasterboard, then cut along marked lines using a plasterboard saw or utility knife against a straight edge.
4. Mixing Adhesive
Follow manufacturer instructions precisely for mixing ratios. The adhesive should be thick enough to hold its shape when applied but not so stiff it's difficult to work with. If too runny, add more powder; if too thick, add small amounts of water.
5. Applying Adhesive Dabs
Apply adhesive dabs in a grid pattern, spacing them approximately 250mm apart both vertically and horizontally. Heavier, thicker boards require larger dabs; lighter EPS boards need less.
On uneven walls, apply more adhesive to low spots to create a level surface. Make dabs progressively larger towards the bottom of each board to support the weight.
6. Fixing the First Board
This is the most important board as it sets the standard for all others. Carefully align the board with your marked guidelines and press firmly against the adhesive dabs.
Use a spirit level to check the board is perfectly vertical in both directions. Adjust position as needed before the adhesive begins to set. Add 3 mechanical fixings (screws with washers) per board for safety and improved bonding. This is particularly important for fire safety - in the event of a fire, the boards won't come off the wall and block exits.
7. Installing Remaining Boards
Position each subsequent board as close as possible to the previous one, minimising gaps. Check each board is level before moving to the next. Leave boards to set for 24 hours before proceeding.
8. Finishing
Fill gaps between boards with joint compound or caulk. Apply joint tape over seams, cover with joint compound, allow to dry, then sand smooth. Check for imperfections and apply additional compound if needed.
Your wall is now ready for a skim coat of plaster, painting or wallpapering.
Best Adhesive for Insulated Plasterboard
Use adhesives specifically formulated for dot and dab application. These typically come as powder that you mix with water to achieve the right consistency.
Top Tips for Dot and Dab Success
- Use plasterboard offcuts on the floor to maintain a small gap at the bottom
- Keep a damp cloth ready to clean excess adhesive before it sets
- Check for electrical wiring and plumbing before applying adhesive
- Make lower dabs bigger to support more weight
- Take extra care with the first board - it determines the quality of the entire wall
- Don't skimp on mechanical fixings - use a minimum 3 per board
How to Install Insulated Plasterboard: Timber Stud Method
Tools and Materials Required
Materials:
- Insulated plasterboard panels
- Treated timber battens (38mm x 50mm typical)
- Plasterboard screws with washers (appropriate length)
- Wall fixings suitable for your wall type
- Joint tape and compound
- Vapour barrier (if required)
Tools:
- Tape measure
- Spirit level or laser level
- Electric drill/screwdriver
- Handsaw or circular saw
- Utility knife
- Stud finder (for existing walls)
- Pencil or chalk line
Step-by-Step Installation
1. Preparation
Measure the wall area to calculate materials needed. Ensure walls are clean, dry and address any damp issues before starting. Check for and resolve any structural concerns.
2. Planning Batten Layout
Mark vertical lines on the wall where battens will be fixed, typically 400-600mm apart depending on board width. Use a spirit level or laser level to ensure lines are perfectly vertical.
Position battens around all openings (windows, doors) and at floor and ceiling junctions. Leave a small gap at floor level to prevent moisture wicking into the timber.
3. Cutting and Fixing Battens
Cut battens to required lengths. Fix securely to wall studs (timber frame) or masonry using appropriate fixings. Each batten must be plumb (vertical) and create a flat plane with adjacent battens.
Check the batten framework is level using a long straight edge across multiple battens. Pack out any low spots to achieve a flat surface.
4. Dry Fitting Boards
Before final fixing, dry fit boards against the batten framework to check they fit properly. Make any necessary adjustments to battens or board sizes.
5. Cutting Boards
Measure and cut boards to size, ensuring board ends fall on the centre line of battens for secure fixing. Leave small expansion gaps around the perimeter.
For outlets and fixtures, measure carefully and cut openings using a plasterboard saw or hole cutter.
6. Fixing Boards to Battens
Start at one corner and work systematically across the wall. Position the first board carefully as it will set the standard for the rest.
Drive plasterboard screws with washers through the board into battens every 300mm along each batten. Place screws 10-15mm from board edges. Screws should sit just below the surface without breaking through the paper facing.
Butt boards tightly together with minimal gaps. Stagger joints between rows to increase strength.
7. Sealing and Finishing
Seal gaps between boards and around edges with caulk to prevent air leakage. Apply joint tape over seams, cover with joint compound, allow to dry, then sand smooth.
Check for any missed screws or imperfections. Fill as needed and sand for a smooth finish, ready for plastering and decorating.
Running Cables Behind Insulated Plasterboard
When using the timber batten method, electrical cables can be run in the cavity between the wall and plasterboard. This is one of the main advantages of battening over dot and dab.
Top Tips for Timber Stud Installation
- Always check for services before drilling or screwing
- Wear safety glasses and gloves during installation
- Consider room humidity when selecting materials
- Ensure adequate ventilation to prevent condensation
- Have a helper when lifting and positioning boards
How to Install Insulated Plasterboard to Loft Rafters
Installing insulated plasterboard to loft rafters creates an insulated, finished ceiling ideal for loft conversions or improving thermal performance in existing lofts.
Tools and Materials Required
- Insulated plasterboard panels
- Timber battens (optional, for counter-battening)
- Long screws and washers (suitable for board thickness)
- Expanding foam or sealant
- Standard tools (tape measure, drill, saw, spirit level)
- Support props or deadman for holding boards
Installation Process
1. Planning and Preparation
Inspect rafters and roof space for any issues. Check for leaks, damp or structural concerns before starting. Measure rafter spacing and lengths to calculate materials needed.
Ensure adequate lighting and ventilation in the loft. Clear the space as much as possible for safe working.
2. Optional Counter-Battening
If rafters are uneven or you want additional insulation space, fix timber battens perpendicular to rafters. This creates a level framework and allows for thicker insulation if required.
3. Cutting Boards
Measure and cut boards to fit between or across rafters, leaving small expansion gaps. For angled cuts following roof pitch, measure carefully and cut using a sharp utility knife or saw.
4. Fixing to Rafters
This is physically demanding work requiring at least two people. Position board against rafters and fix using long screws with large washers. The washers prevent screws pulling through the board.
Start fixing from the centre of each board and work outwards. Space screws appropriately along each rafter. Ensure screws penetrate rafters sufficiently for secure fixing.
5. Sealing
Use expanding foam or sealant to fill gaps between boards and around edges. Proper sealing maximises insulation effectiveness and prevents air leakage.
6. Finishing
Tape joints with joint tape, apply compound, allow to dry and sand smooth. Inspect for any missed fixings or gaps requiring attention.
Important Considerations
- Ensure loft conversions comply with Building Regulations
- Plan electrical wiring before boarding
- Check roof for leaks before insulating
- Provide adequate ventilation to roof space
- Consider fire safety requirements for habitable lofts
Can You Put Insulated Plasterboard on a Ceiling?
Yes, insulated plasterboard can be installed on ceilings, providing both thermal insulation and a smooth finish. However, ceiling installation requires careful planning and at least two people for a safe installation.
Ceiling Installation Considerations
Structural Support The ceiling structure must be capable of supporting the additional weight of insulated plasterboard, which is heavier than standard plasterboard. Check joist spacing and strength before proceeding.
Fixing Method Mechanical fixing (screws to joists) is essential for ceiling applications. Never rely on adhesive alone for ceiling installations due to safety concerns.
Access and Safety You'll need a stable working platform with good access to the entire ceiling. Never work alone when installing ceiling boards.
How to Install Insulated Plasterboard to a Ceiling
Tools and Materials Required
- Insulated plasterboard panels
- Plasterboard screws with washers
- Timber battens (if levelling required)
- Support props or deadman
- Scaffold tower or stable ladder platform
Installation Process
1. Safety and Planning
Set up secure working platform with good access to entire ceiling. Wear safety glasses and dust mask.
Locate and mark ceiling joists using a stud finder or tapping method. Plan board layout so joints fall on joist centres and are staggered between rows.
2. Optional Battening
If joists are uneven, install timber battens across joists at 400mm centres. This provides a level fixing surface and creates space for additional insulation if required.
3. Cutting Boards
Cut boards to size with ends falling on joist centres. Cut holes for light fittings or other fixtures before lifting boards into position.
4. Lifting and Fixing
This requires at least two people. Lift board into position and support with props or deadman whilst fixing. Start fixing from the centre and work outwards.
Fix screws every 300mm along each joist, positioned 10-15mm from board edges. Screws should sit just below the surface without breaking the paper.
5. Completing Installation
Continue across ceiling, butting boards tightly and maintaining staggered joints. Tape and fill joints, allow to dry and sand smooth.
Safety Considerations
- Always work with a helper
- Use stable working platform
- Check for electrical cables before screwing
- Ensure ceiling structure can support board weight
- Complete all electrical work before boarding
Do You Need a Vapour Barrier with Insulated Plasterboard?
Whether you need a vapour barrier depends on different factors like humidity, location, the type of plasterboard and any building regulations that apply.
Insulated Plasterboard Advantages:
- Single product solution
- No risk of damaging separate vapour barrier during installation
- Guaranteed continuity of vapour control
- Simpler installation
Considerations:
- Joints between boards must use foil tape to maintain vapour barrier integrity
- Penetrations (electrical boxes, pipes) need careful sealing
- Not all products include vapour barriers - check specifications
Finishing Insulated Plasterboard Installations
Regardless of installation method, proper finishing ensures a professional appearance and prepares surfaces for decoration.
Taping and Filling Joints
Apply joint tape centred over all board joints. Cover with jointing compound using a broad knife, feathering edges smoothly. Allow to dry completely (usually 24 hours) before applying a second coat if needed.
Sand dried compound smooth using fine-grit sandpaper. Avoid sanding through to the joint tape.
Corners and Edges
Internal corners can be taped and filled similarly to joints. External corners benefit from metal or plastic corner beads for durability and crisp edges.
Electrical Boxes and Fixtures
Socket boxes and switches will likely need extending to accommodate the insulated plasterboard thickness. Extension boxes and frames are readily available for this purpose. Always follow electrical regulations and consider hiring a qualified electrician.